Conduit mPower: LoRa Communication and Node-RED
NOTE: Support for Node-RED/Node.js on Multitech AT91SAM9G25-based products has been discontinued within mPower 5.3. For mPower 5.3.3 to 5.3.8, users can install Node-RED as a custom application. mPower 6.0 or later no longer supports this custom app option.
The following instructions are still applicable for mPower MTCDT 5.2.1 and MTCAP 5.2.1 and earlier on all devices. And also applies to any non-AT91SAM9G25-based products.
Refer to this alterative example of a default application and server with API implementation for a distributed LoRaWAN network (includes Python code example) : https://github.com/MultiTechSystems/lorawan-app-connect.
For information on how to convert NodeRED to Python and Python code using MQTT broker and LoRa, see the following example: https://github.com/russmin/Node-Red-Python
For more details on other methods and examples of custom applications, see Creating a Custom Application.
Prerequisites
- Set up Conduit AEP and mDot for use with LoRa. Refer to Getting Started with LoRa Conduit AEP (LoRa Configuration).
Receive Packets on the Conduit
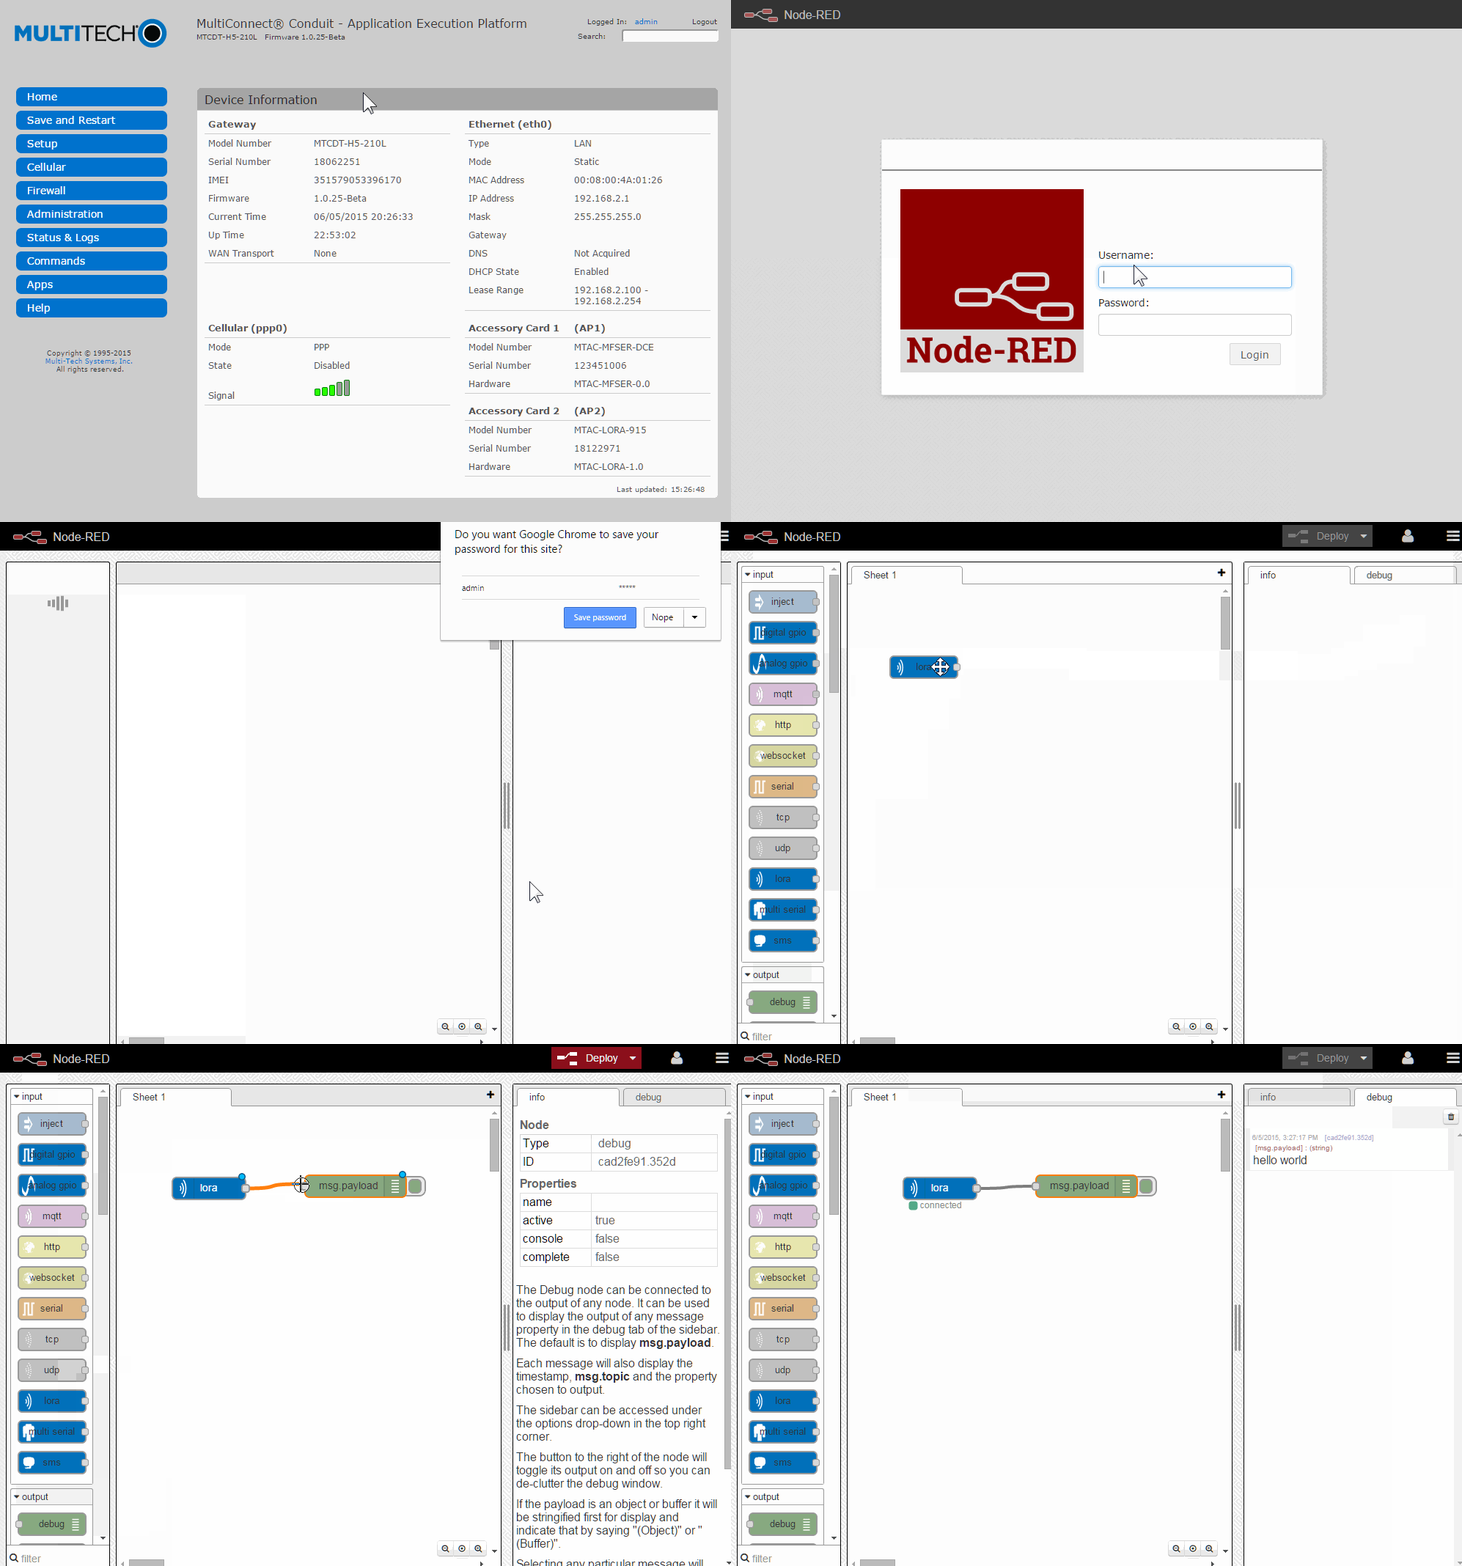
- Log into the AEP interface. Refer to Getting Started with AEP [the linked post is not published yet] if needed.
- Click on Node-RED under Apps on the left sidebar
- Log into Node-RED with the password set in the wizard. The default password is admin.
- Drag the lora input node to the canvas
- Connect the lora node to the debug node. On the right side of the lora node, click on the small gray dot and drag a wire to the small gray dot on the left side of the debug node
- Click the red Deploy button at the top right of the page
- Click on the Debug tab at the right side of the page to view received lora packets.

Transmit Packets from the Conduit
- Create the flow described above for receiving lora packets
- Drag the lora out node to the canvas
- Drag a function node to the canvas and place between the lora-in and lora-out nodes
- Connect a wire from the lora in node to the function input and from the function output to the lora out node
- Configure the function block as follows to disable scheduling confirmed downlinks:
msg.ack = false;

return msg; - Click the red Deploy button at the top right of the page

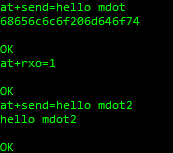
Sending and receiving packets on the mDot:

LoRa Input Datatypes
The LoRa input node has two modes of operation which can be switched between by editing the “Data Type” field. There are two options:
- UTF-8. The payload of the LoRa packet is parsed as UTF-8 characters before being injected to the flow.
- Bytes. The payload of the LoRa packet is not parsed before being injected into the flow.