Installing Chirpstack Bridge
Overview
We can install the ChirpStack Bridge directly on the mPower gateways. This requires mPower 6.3.0 or higher. The bridge package will be lost on firmware upgrade and need to be reinstalled.
Interactive Wiki site for ChirpStack installation documentation
System Design
The system follows the following pattern:
- The Packet Forwarder using the UDP protocol or Basics Station using WebSockets communicates with the onboard ChirpStack Gateway Bridge.
- The onboard ChirpStack Gateway Bridge communicates to the MQTT Broker using MQTT messages.
- The MQTT Broker communicates to the ChirpStack Server using MQTT messages.

Installation using OPKG package manager
- Unsigned IPK depending on your architecture, must be installed via custom app or command line using opkg install:
Installation using signed package manager
- Download the signed tarball depending on your architecture:
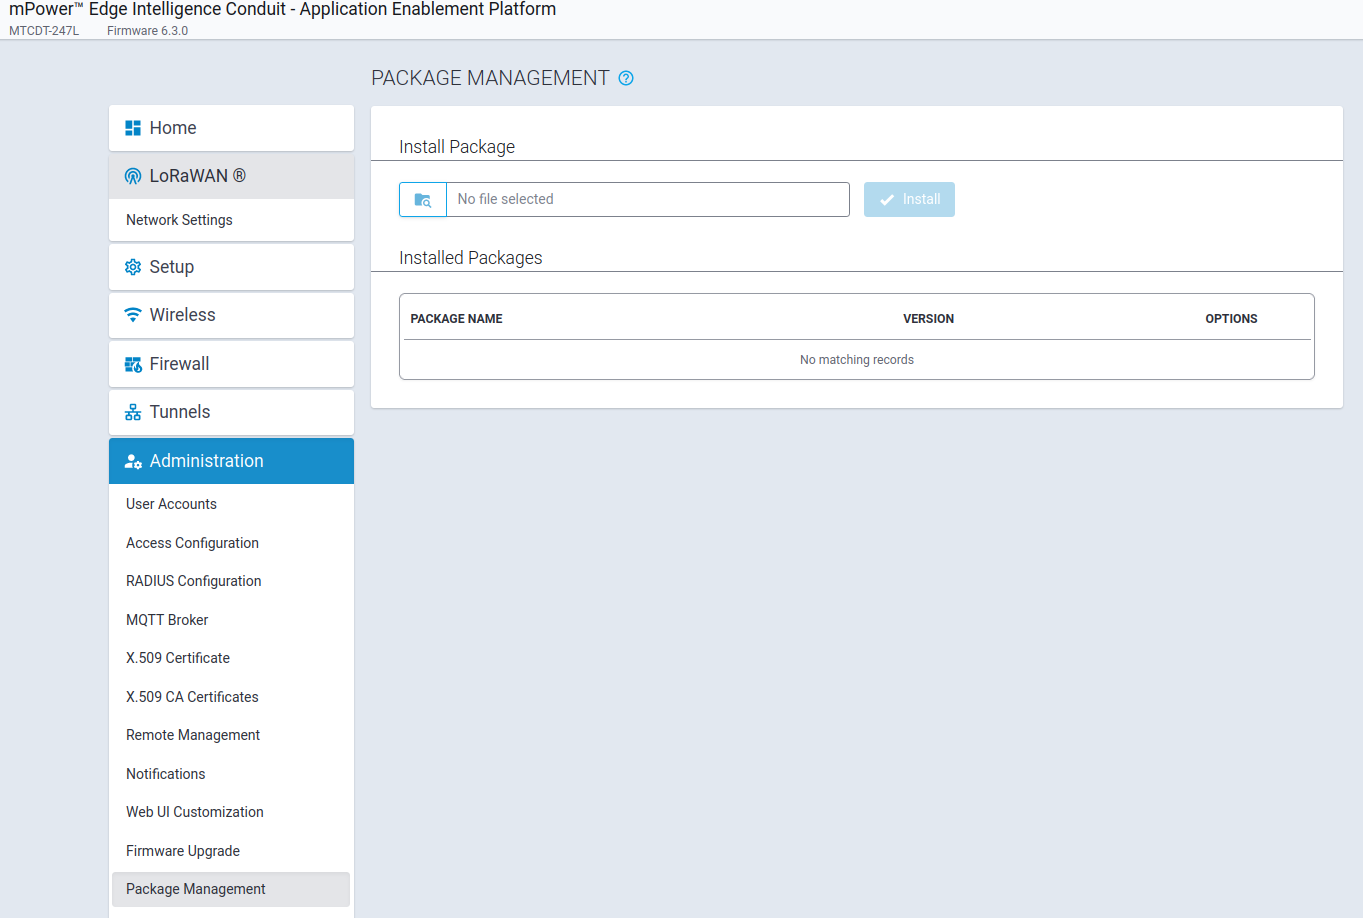
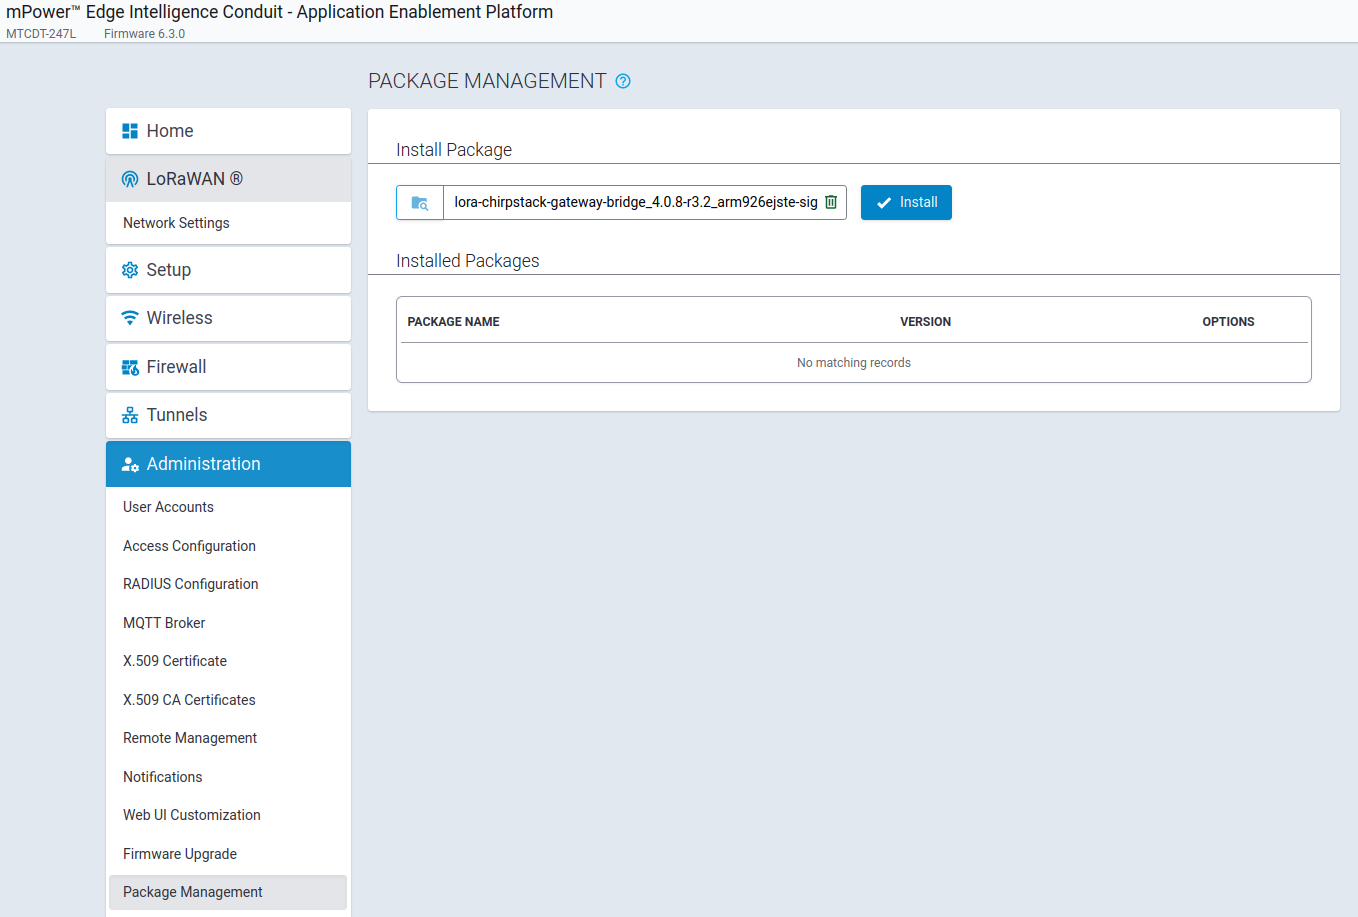
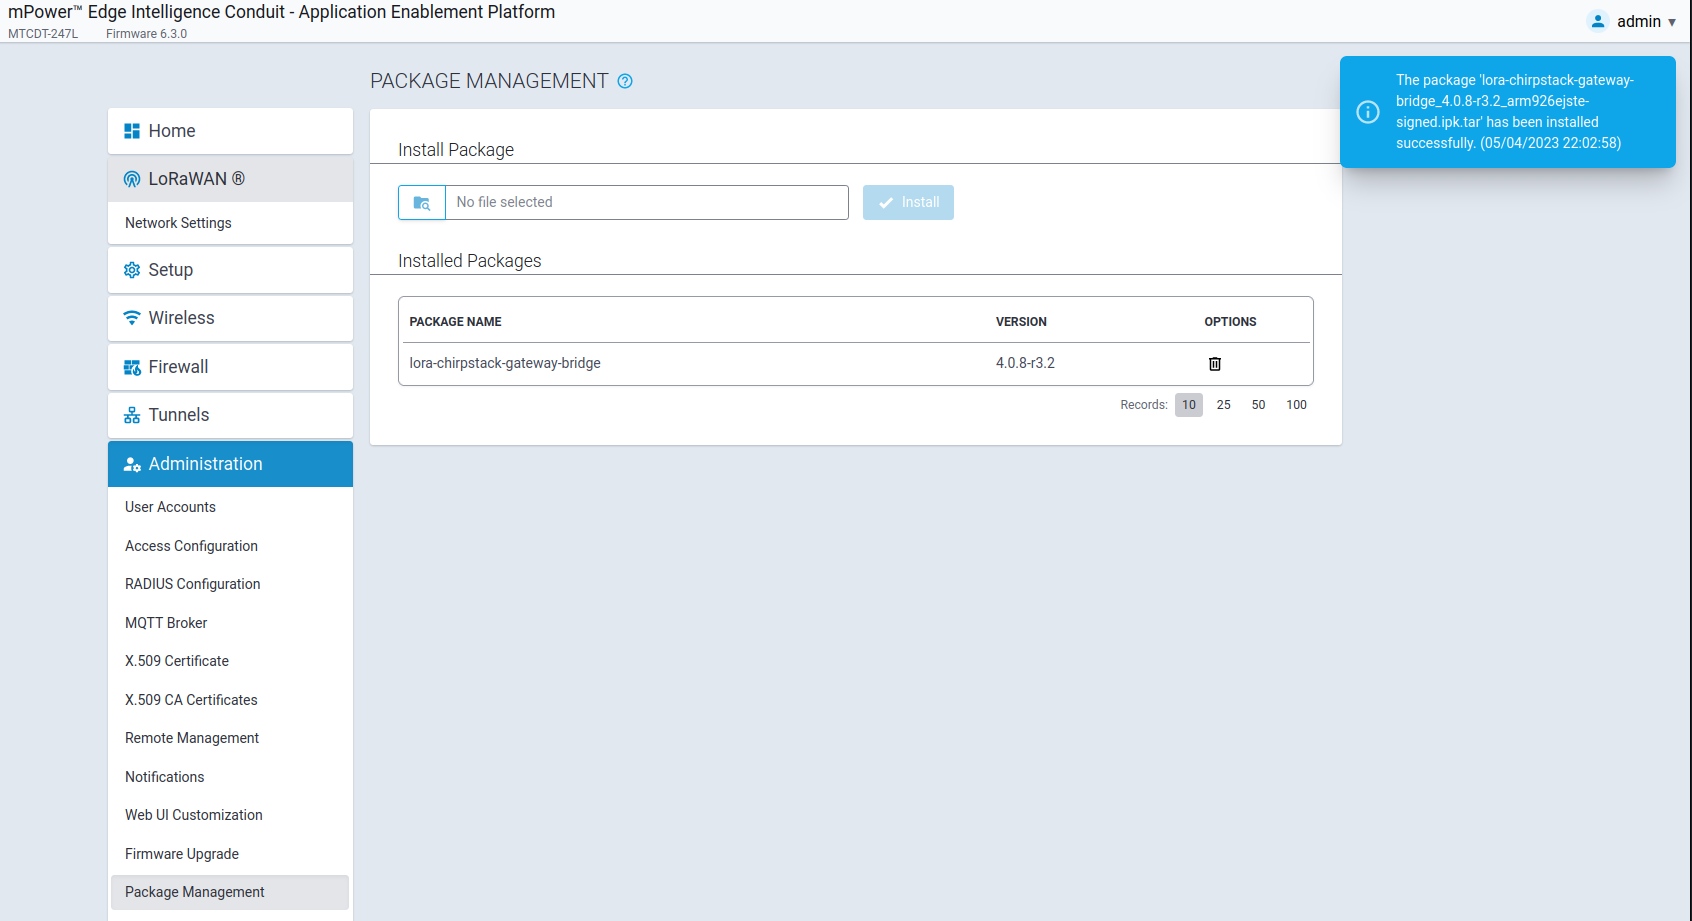
- Login to your device and navigate to administration/package_management

- Pick the package from the folder icon and click install

- The package should appear in the ‘Installed Packages’ section
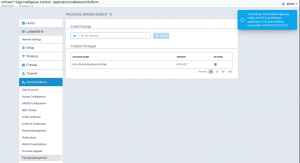
- ChirpStack Gateway Bridge Configuration is now available in LoRaWAN > Network Settings

Setup
LoRa Packet Forwarder + ChirpStack
Go to the LoRa Network Page

Set the LoRa Mode to PACKET FORWARDER

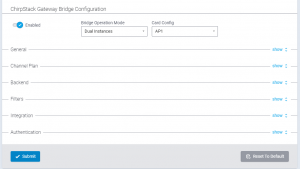
Enable ChirpStack Gateway Bridge Configuration
Enabling this toggle will display all the ChirpStack settings and automatically configure the LoRa Packet Forwarder Server Settings

From the LoRa Packet Forwarder side, enabling this setting will do the following:
- Hide the Server Settings since it will be communicating with the ChirpStack Gateway Bridge
- Set Server Address for the LoRa Packet Forwarder to 127.0.0.1 (Since our ChirpStack Gateway Bridge is installed locally)
- Configure the Upstream and Downstream ports for the LoRa Packet Forwarder to whatever value you pick with the Backend Port Bind in the
ChirpStack Gateway Bridge Configuration 

Note: If you don’t see the ChirpStack Gateway Bridge Configuration enable toggle, the package was not installed correctly.
Setup LoRa Packet Forwarder
Setup your Channel Plan and other relevant settings.

Setup ChirpStack Gateway Bridge
Setup the relevant settings. The Port Bind within the Backend section is automatically synced with the LoRa Packet Forwarder

Authentication
Generic MQTT
This mode assumes you have generic MQTT Server(s) and let you setup all standard MQTT Server settings. The MQTT Broker should be the IP address of the Chirpstack install and not the default 127.0.0.1 value shown below.

Note: The Ca Certificate File, TLS Certificate File and TLS Key File require the raw data of these files to be pasted in, not a path within the device
Azure IoT Hub
This mode sets you set the Azure specific requirements.

Note: TLS Certificate File and TLS Key File require the raw data of these files to be pasted in, not a path within the device
LoRa Basic Station + ChirpStack
Go to the LoRa Network Page
Set the LoRa Mode to BASIC STATION

Enable ChirpStack Gateway Bridge Configuration
Enabling this toggle will display all the ChirpStack settings and automatically configure the LoRa Basic Station Server Settings
From the LoRa Basic Station side, enabling this setting will do the following:
- Set Server Address for the LoRa Basic Station to 127.0.0.1 (Since our ChirpStack Gateway Bridge is installed locally)
- Configure the Upstream and Downstream ports for the LoRa Basic Station to whatever value you pick with the Backend Port Bind in the
ChirpStack Gateway Bridge Configuration
Note: If you don’t see the ChirpStack Gateway Bridge Configuration enable toggle, the package was not installed correctly.
Setup LoRa Basic Station
Station Config
Setup your station config depending on your hardware. Example configurations can be found here

Credentials
This should be set to LNS mode

URI
This parameter sets up the Websocket for the LoRa Basic Station. The format is:
websocket-type://server-address:port
There are two options available:
- WebSocket (ws://) – For non-TLS connections
- Example:
ws://localhost:1780
- Example:
- WebSocket Secure (wss://) – For TLS-secured connections
- Example:
wss://localhost:1780
- Example:
Note: The Server Address must be localhost/127.0.0.1 and the port must match what you set in UDP bind input of the Backend section within ChirpStack Gateway Bridge

Certificates (Optional)
If you would like the communication between the LoRa Basic Station and the ChirpStack Gateway Bridge to be encrypted, you will need to setup the relevant certificates.
Note: This information needs to match whatever you set within the ChirpStack Gateway Bridge Configuration
Two of the most popular modes are:
Server TLS (CA Certificate Required)
You will need to fill in the Server Cert with its data
Mutual TLS (CA + Client Certificate Required)
You will need to fill in the Server Cert, Gateway Cert and Gateway Key with their data

Note: The Ca Certificate File, TLS Certificate File and TLS Key File require the raw data of these files to be pasted in, not a path within the device
Setup ChirpStack Gateway Bridge
Channel Plan
This section lets you generate a channel plan. The channels defined here need to match the LoRa Basic Station

Backend
The UDP Bind needs the server to be localhost and the port needs to match whatever you set in the LoRa Basic Station URI. If you configured certificates for the WebSocket communication in the LoRa Basic Station configuration, these certs will need to be matched here.

Authentication
Generic MQTT
This mode assumes you have generic MQTT Server(s) and let you setup all standard MQTT Server settings. The MQTT Broker should be the IP address of the Chirpstack install and not the default 127.0.0.1 value shown below.
Note: The Ca Certificate File, TLS Certificate File and TLS Key File require the raw data of these files to be pasted in, not a path within the device
Azure IoT Hub
This mode sets you set the Azure specific requirements.